- PHP Basics
- Learn PHP
- PHP Comments
- PHP Data Types
- PHP Variables
- PHP Operators
- PHP echo
- PHP print
- PHP echo vs. print
- PHP if else
- PHP switch
- PHP for Loop
- PHP while Loop
- PHP do...while Loop
- PHP foreach Loop
- PHP break and continue
- PHP exit()
- PHP exit() vs. break
- PHP isset()
- PHP Arrays
- PHP print_r()
- PHP unset()
- PHP Strings
- PHP Functions
- PHP File Handling
- PHP File Handling
- PHP Open File
- PHP Create a File
- PHP Write to File
- PHP Read File
- PHP feof()
- PHP fgetc()
- PHP fgets()
- PHP Close File
- PHP Delete File
- PHP Append to File
- PHP Copy File
- PHP file_get_contents()
- PHP file_put_contents()
- PHP file_exists()
- PHP filesize()
- PHP Rename File
- PHP fseek()
- PHP ftell()
- PHP rewind()
- PHP disk_free_space()
- PHP disk_total_space()
- PHP Create Directory
- PHP Remove Directory
- PHP Get Files/Directories
- PHP Get filename
- PHP Get Path
- PHP filemtime()
- PHP file()
- PHP include()
- PHP require()
- PHP include() vs. require()
- PHP mysqli Tutorial
- PHP mysqli Tutorial
- PHP and MySQL Setup
- PHP mysqli: Create Database
- PHP mysqli: Create Table
- PHP mysqli: Insert Record
- PHP mysqli: Update Record
- PHP mysqli: Fetch Record
- PHP mysqli: Delete Record
- PHP mysqli: SignUp Page
- PHP mysqli: LogIn Page
- PHP mysqli: Store User Data
- PHP mysqli Functions
- PHP mysqli_connect()
- PHP mysqli_close()
- PHP mysqli_connect_errno()
- PHP mysqli_connect_error()
- PHP mysqli_query()
- PHP mysqli_fetch_row()
- PHP mysqli_fetch_assoc()
- PHP mysqli_fetch_array()
- PHP mysqli_free_result()
- PHP mysqli_error()
- PHP mysqli_prepare()
- PHP mysqli_stmt_bind_param()
- PHP mysqli_stmt_execute()
- PHP mysqli_stmt_fetch()
- PHP mysqli_stmt_store_result()
- PHP mysqli_stmt_num_rows()
- PHP mysqli_stmt_bind_result()
- PHP mysqli_stmt_get_result()
- PHP mysqli_result class
- PHP mysqli_report()
- PHP error_reporting()
- PHP mysqli_real_escape_string()
- PHP htmlspecialchars()
- PHP Misc Topics
- PHP Object Oriented
- PHP new Keyword
- PHP header()
- PHP getallheaders()
- PHP Cookies
- PHP Sessions
- PHP Date and Time
- PHP GET vs. POST
- PHP File Upload
- PHP Image Processing
Create MySQL Table using PHP mysqli Script
This article is created to describe how to create a MySQL table using the PHP mysqli script. To complete the task, I approached it in two ways:
- Using the PHP mysqli object-oriented script
- Using the PHP mysqli procedural script
Whatever method we use to create a table with PHP mysqli script. Some of the main steps we have to follow are:
- Open a connection to the database.
- Write the SQL statement regarding the table creation.
- Initialize the written SQL statement to a variable.
- Use this variable to perform the query against the MySQL database.
- Close the database connection.
For example, in this article, to create a table, I am going to use the following SQL code:
CREATE TABLE customer (
   id INT(6) UNSIGNED AUTO_INCREMENT PRIMARY KEY,
   name VARCHAR(30) NOT NULL,
   age INT(2),
   email VARCHAR(40) NOT NULL)
This SQL query creates a table named customer with the following columns:
- id
- name
- age
While creating the columns, be sure to provide the data type of the column along with its size.
Note: The UNSIGNED keyword is used when we do not want any negative value to be inserted in the column in any way.
Note: The AUTO_INCREMENT is used to increment the value by 1 each time on the insertion of a new row.
Note: The PRIMARY KEY is used when we need to specify a column as a primary column. The primary column (field) uniquely identifies each row (record) in the table.
Note: The VARCHAR refers to a string that can consist of letters, numbers, and special characters.
Note: The INT refers to a standard-sized integer. The range is from -2147483648 to 2147483647.
Note: The NOT NULL is used to not accept NULL values.
Create MySQL Table using PHP mysqli Object-Oriented Script
To create a MySQL table using a PHP mysqli object-oriented script, follow the example given below:
<?php
   $servername = "localhost";
   $username = "root";
   $password = "";
   $dbname = "codescracker";

   $conn = new mysqli($servername, $username, $password, $dbname);

   if($conn->connect_errno)
   {
      echo "Connection to the database failed!<BR>";
      echo "Reason: ", $conn->connect_error;
      exit();
   }

   $sql = "CREATE TABLE customer (
      id INT(6) UNSIGNED AUTO_INCREMENT PRIMARY KEY,
      name VARCHAR(30) NOT NULL,
      age INT(2),
      email VARCHAR(40) NOT NULL
   )";

   $qry = $conn->query($sql);
   if($qry)
   {
      echo "Table created successfully.";

      // block of code to process further...
   }
   else
   {
      echo "Table has not been created!<BR>";
      echo "Reason: ", $conn->error;
   }
   $conn->close();
?>
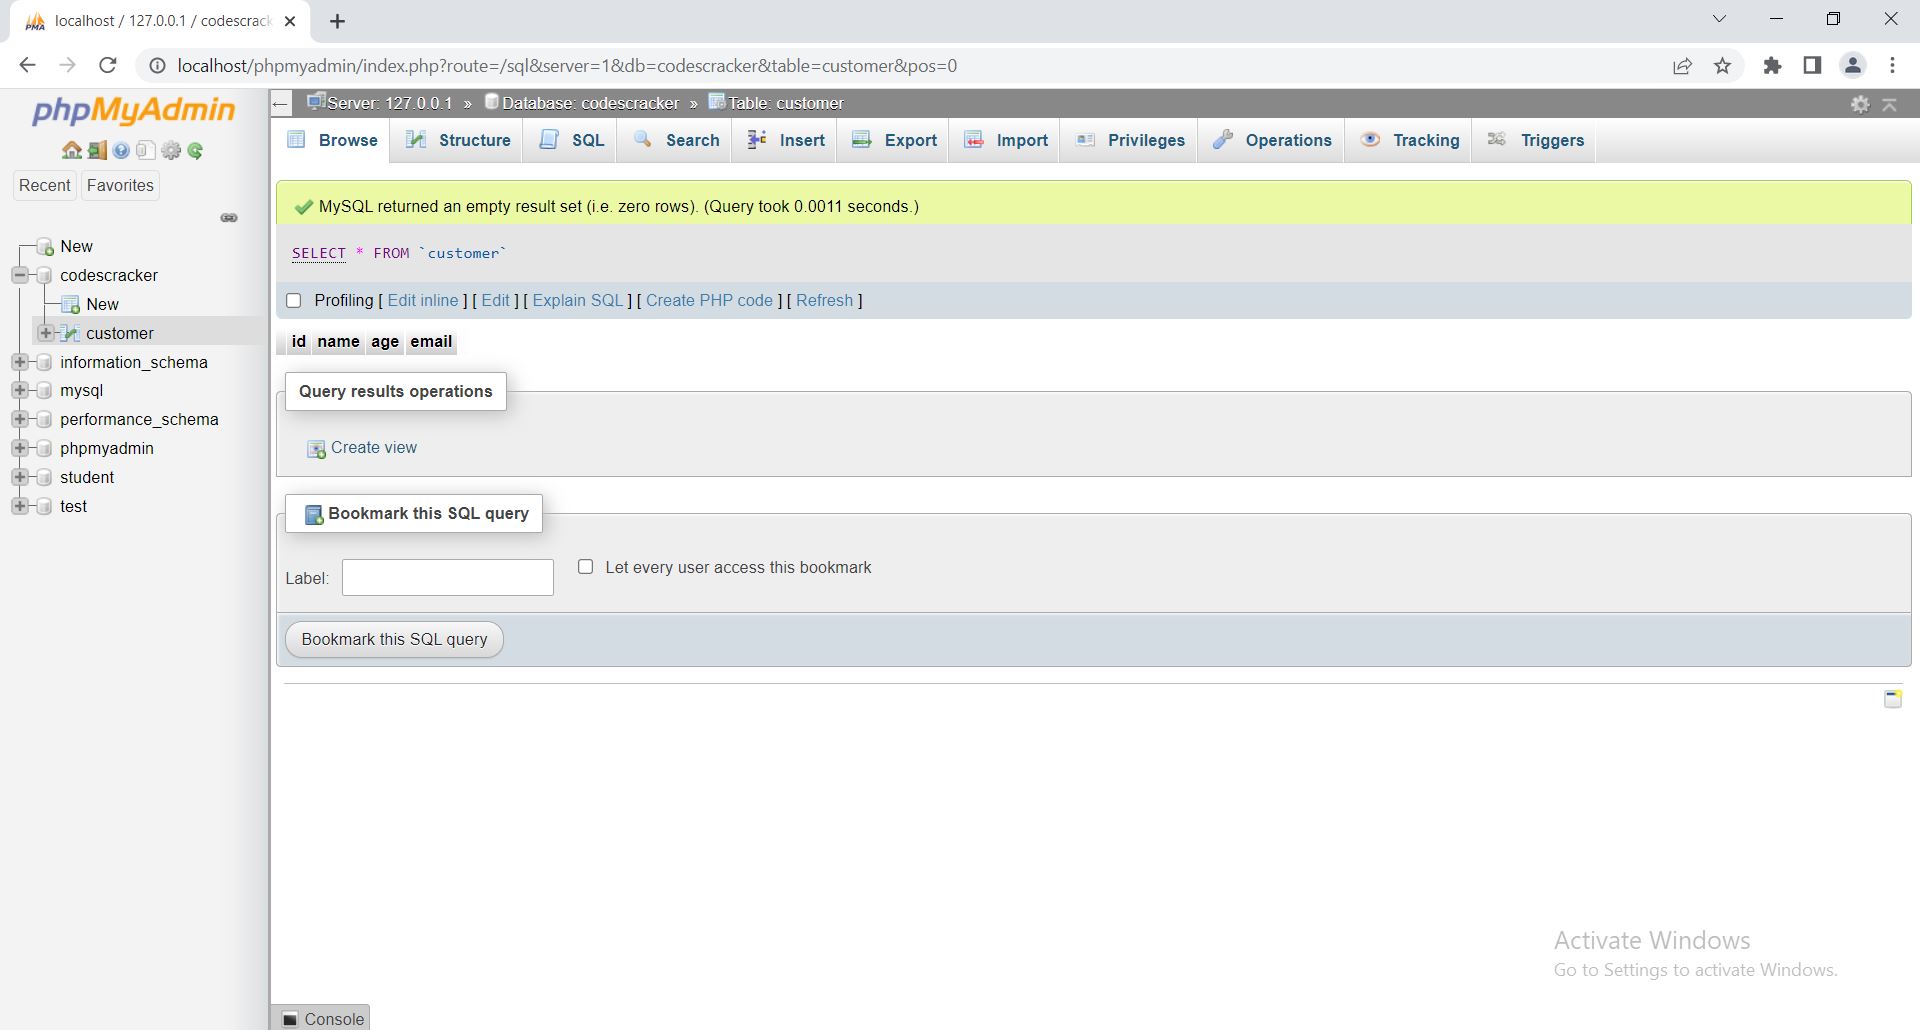
The output produced by the above PHP example of "creating a table" is shown in the snapshot given below:

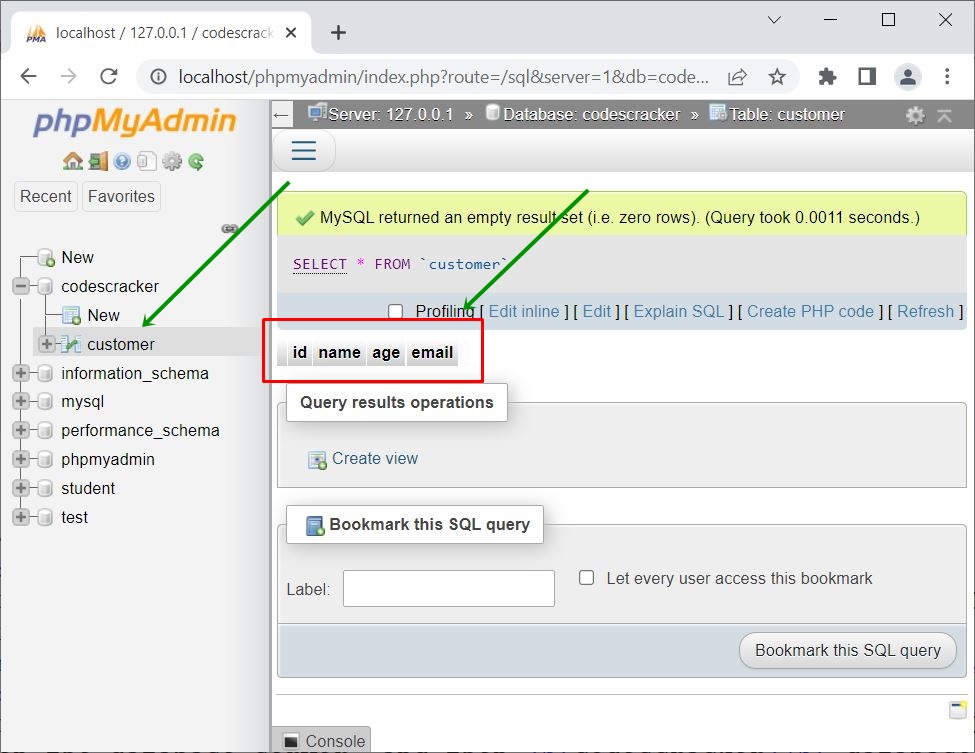
Since the table named customer is created in the database named codescracker. Therefore, if you open the MySQL database server and then the codescracker database. There, you will see the customer table with four columns: id, name, age, and email. Here is a snapshot of the table:
That is:
Now let me re-execute the above PHP script again. Okay, here is the output I have:
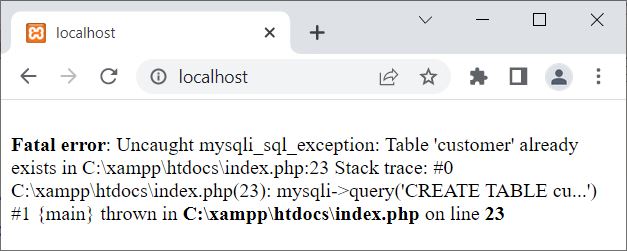
That is:
Fatal error: Uncaught mysqli_sql_exception: Table 'customer' already exists in C:\xampp\htdocs\index.php:23 Stack trace: #0 C:\xampp\htdocs\index.php(23): mysqli->query('CREATE TABLE cu...') #1 {main} thrown in C:\xampp\htdocs\index.php on line 23
Saying that the table named customer already exists. This output is produced because I have already created the table customer using the previous PHP mysqli object-oriented script.
But the problem with the above output is that the error we are seeing is not one that I have written in script. That is because of the default error reporting mode. Therefore, to print our own error message, we need to change the mode using either mysqli_driver() (for object-oriented script) or mysqli_report() (for procedural script). For example:
<?php
   $driver = new mysqli_driver();
   $driver -> report_mode = MYSQLI_REPORT_OFF;

   $conn = new mysqli("localhost", "root", "", "codescracker");

   if($conn->connect_errno)
   {
      echo "Connection to the database failed!<BR>";
      echo "Reason: ", $conn->connect_error;
      exit();
   }

   $sqlCode = "CREATE TABLE customer (
      id INT(6) UNSIGNED AUTO_INCREMENT PRIMARY KEY,
      name VARCHAR(30) NOT NULL,
      age INT(2),
      email VARCHAR(40) NOT NULL
   )";

   if(!$conn->query($sqlCode))
   {
      echo "Table has not been created!<BR>";
      echo "Reason: ", $conn->error;
   }
   // block of code to process further

   $conn->close();
?>
Now the output should be:
Table has not been created!
Reason: Table 'customer' already exists
Note: The mysqli() function is used to open a connection to the MySQL database server in object-oriented style.
Note: The new keyword is used to create a new object.
Note: The connect_errno is used to get or return the error code (if any) from the last connect call in object-oriented style.
Note: The connect_error is used to get the error description (if any) from the last connection in object-oriented style.
Note: The query() function is used to perform queries on the MySQL database in object-oriented style.
Note: The error is used to return the description of the error (if any) by the most recent function call in object-oriented style.
Note: The close() function is used to close an opened connection in object-oriented style.
Note: The mysqli_driver() function is used to modify the error reporting mode in object-oriented style.
Create MySQL Table using PHP mysqli Procedural Script
To create a MySQL table using a PHP mysqli procedural script, follow the example given below:
<?php
   mysqli_report(MYSQLI_REPORT_OFF);

   $conn = mysqli_connect("localhost", "root", "", "codescracker");

   if(mysqli_connect_error())
   {
      echo "Connection to the database failed!<BR>";
      echo "Reason: ", mysqli_connect_error();
      exit();
   }

   $sqlCode = "CREATE TABLE student (
      id INT(6) UNSIGNED AUTO_INCREMENT PRIMARY KEY,
      name VARCHAR(30) NOT NULL,
      age INT(2),
      email VARCHAR(40) NOT NULL
   )";

   if(mysqli_query($conn, $sqlCode))
   {
      echo "Table has been created successfully.";
      // block of code to process further...
   }
   else
   {
      echo "Table has not been created!<BR>";
      echo "Reason: ", mysqli_error($conn);
   }

   mysqli_close($conn);
?>
Note: The mysqli_report() function is used to modify the error reporting mode in procedural style.
Note: The mysqli_connect() function is used to open a connection to the MySQL database server in procedural style.
Note: The mysqli_connect_errno() function is used to get or return the error code (if any) from the last connect call in procedural style.
Note: The mysqli_connect_error() function is used to return the error description (if any) from the last connection in procedural style.
Note: The mysqli_query() function is used to perform queries on the MySQL database in procedural style.
Note: The mysqli_error() function is used to return the description of the error (if any) from the most recent function call in object-oriented style.
Note: The mysqli_close() function is used to close an opened connection to the MySQL database in procedural style.
PHP MySQL: Create Table Manually
We can also create a table manually. As already mentioned, I am using XAMPP for this "PHP mysqli" tutorial series. Therefore, follow these steps to create a MySQL table manually, without any PHP script.
Step No. 1: Open XAMPP.
Step No. 2: Click on the Start button next to Apache.
Step No. 3: Click on the Start button next to MySQL.
Step No. 4: Click on the Admin button next MySQL.
Step No. 5: Click on the Databases.
Step No. 6: Select or click on the Database, say codescracker.
Step No. 7: Type the name of the table, say client, and type the number of columns to insert in the table, say 4. Here is the snapshot:
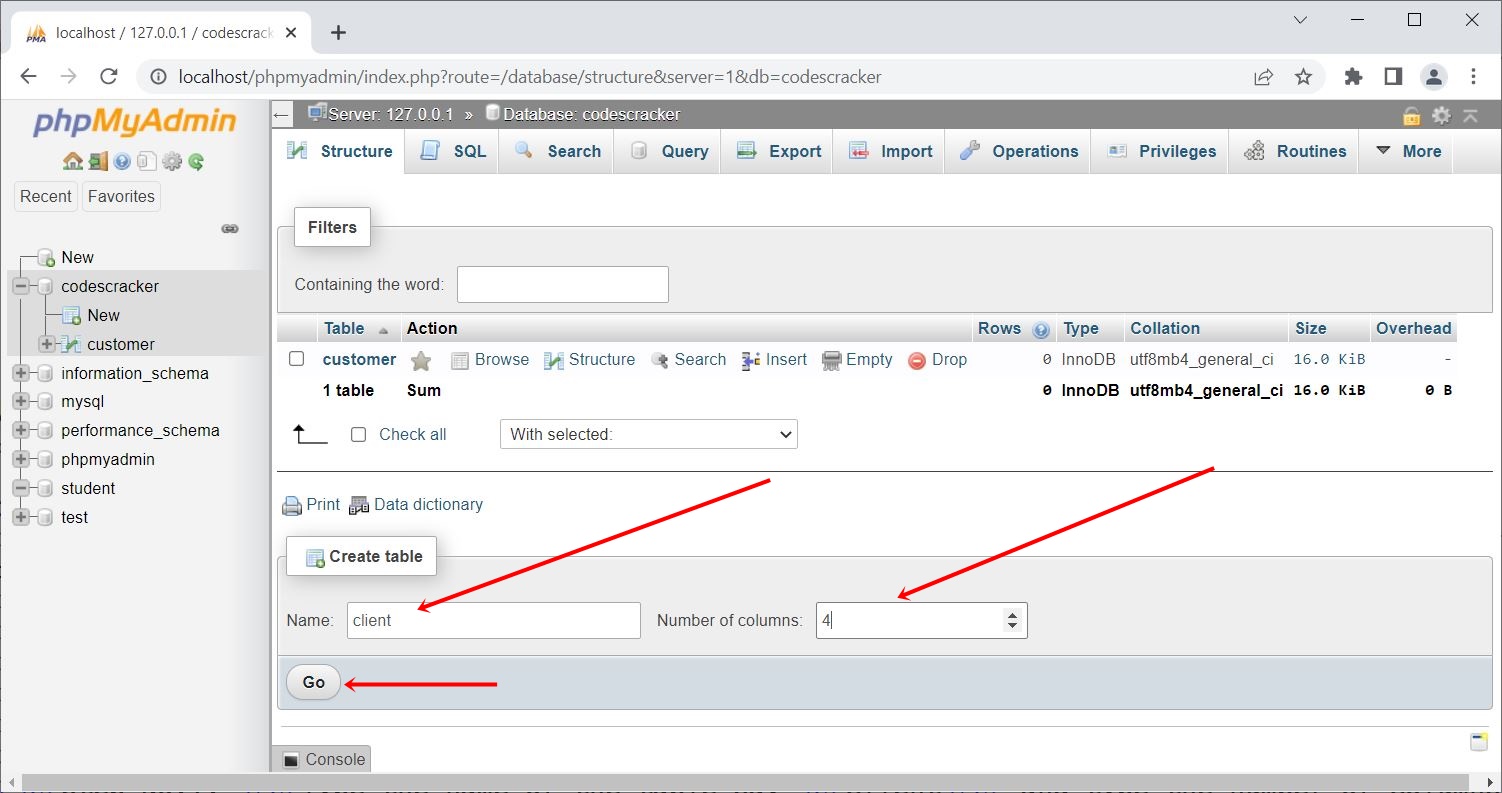
Step No. 8: Now click on the Go link or button. Here is the snapshot of the new window:
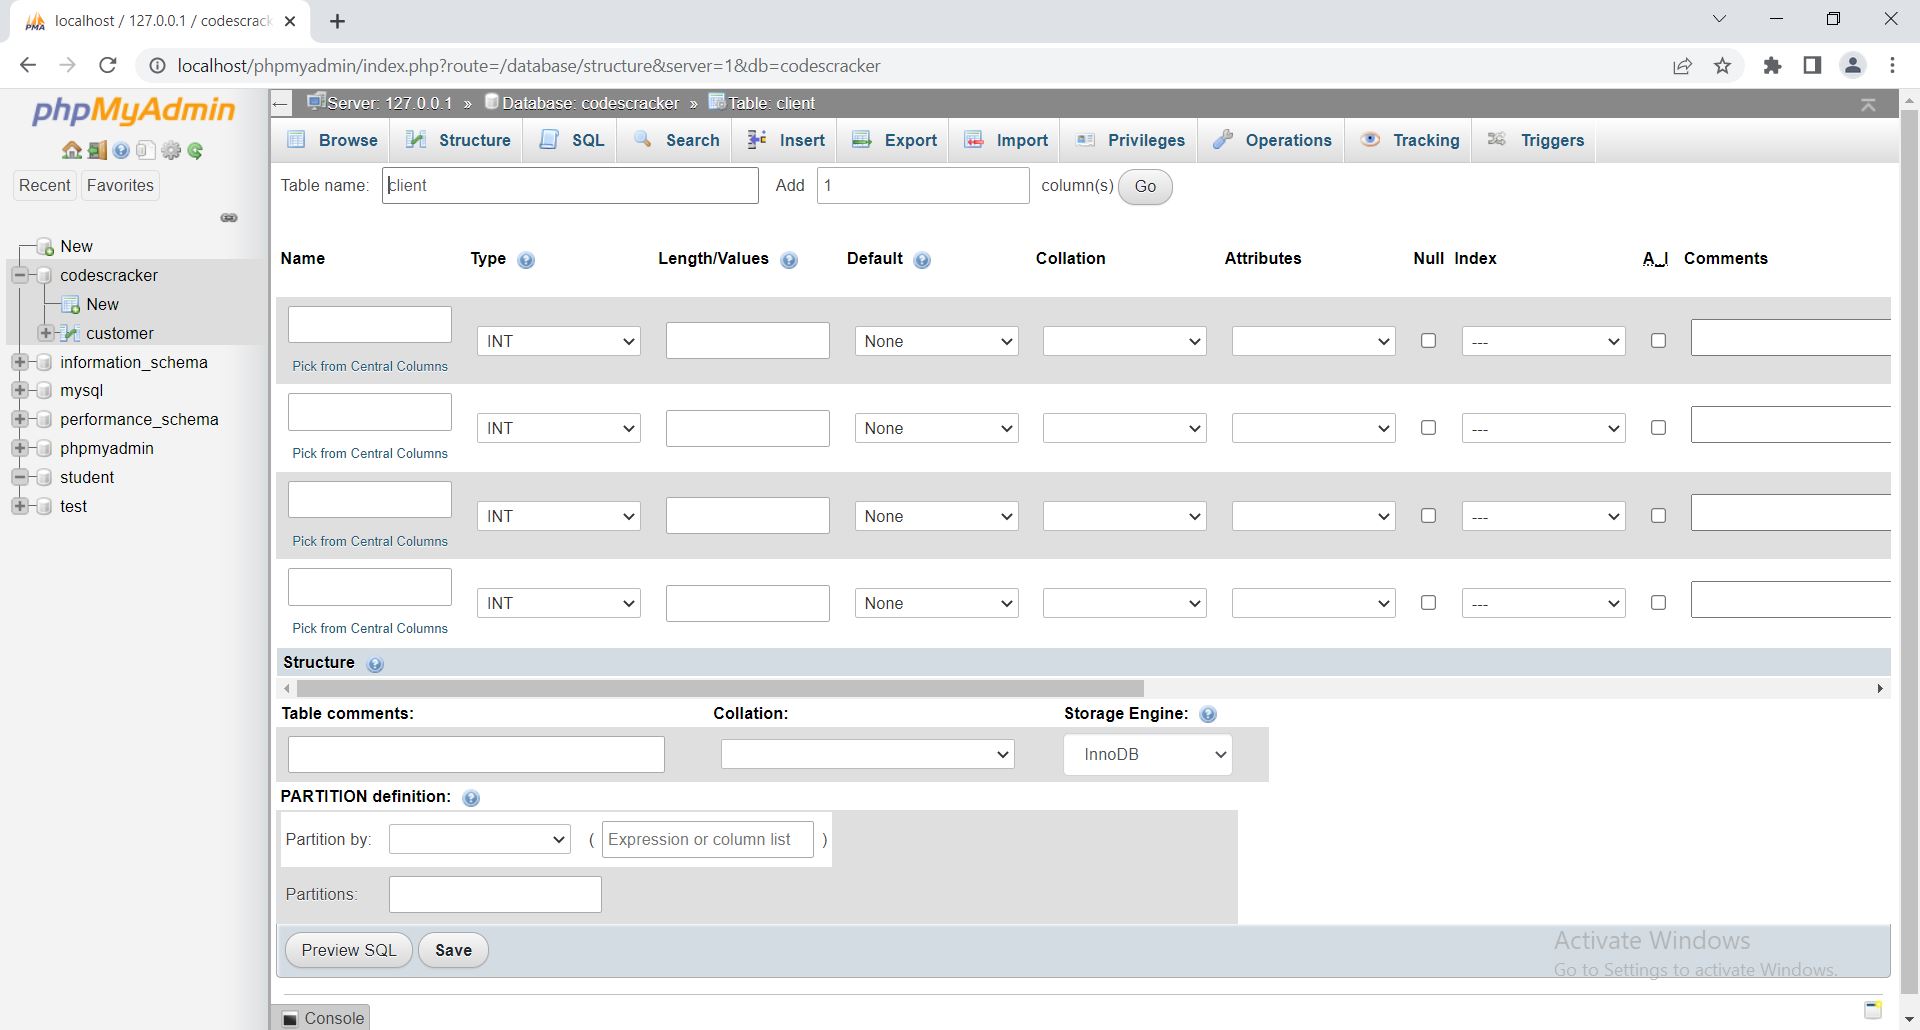
Step No. 9: Now fill the details of all four columns, and then click on Save to create the table.
« Previous Tutorial Next Tutorial »