- Java Programming Basics
- Java Tutorial
- Java Environment Setup
- Java Separators
- Java Data Types
- Java Variables
- Java Variable Scope
- Java Type Casting
- Java Operators
- Java Increment Decrement
- Java Left Shift
- Java Right Shift
- Java Bitwise Operators
- Java Ternary Operator
- Java Control Statements
- Java if-else statement
- Java for Loop
- Java while Loop
- Java do-while Loop
- Java switch Statement
- Java break Statement
- Java continue Statement
- Java Popular Topics
- Java Arrays
- Java Multidimensional Array
- Java Strings
- Java Methods
- Java Date and Time
- Java Exception Handling
- Java File Handling
- Java OOP
- Java Classes and Objects
- Java Constructors
- Java Constructor Overloading
- Java Object as Parameter
- Java Returning Objects
- Java Encapsulation
- Java Abstraction
- Java Inheritance
- Java Polymorphism
- Java Packages
- Java Import Statement
- Java Multithreading
- Java Suspend Resume Stop Thread
- Java Programming Examples
- Java Programming Examples
Java Environment Setup
Setting up a Java environment is a crucial step in starting your next project, whether you're a novice or seasoned developer. This blog post will go over installation and configuration advice as well as everything else you need to know to set up your Java environment. So let's get started with Java development if you're ready to do so!
Compile and Run a Java Program
To compile and run your Java program, you have to first setup an environment for Java programming. You can set up an environment for Java without any software, just by using your computer's command prompt. But this is time taking environment. It means if you compile and run your Java program using the command prompt, this consumes your extra time for each and every Java program.
So you can easily use a Java compiler or IDE like Netbean or BlueJ to compile and run your Java program. These two Java compilers/IDEs are the most popular Java compilers/IDEs.
Let's see how to setup an environment using NetBean and BlueJ and also using the command prompt (cmd).
Java Environment Setup: BlueJ
To compile and run your Java program using BlueJ, follow the following steps:
1. Download the Java Development Kit (JDK) from the Internet and install it.
2. Now download BlueJ from the Internet and install it.
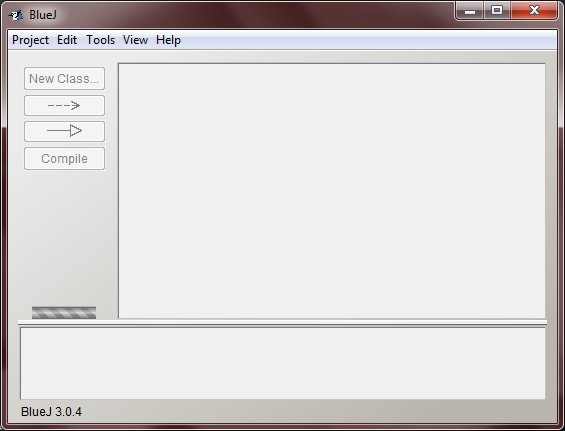
3. After installing BlueJ, open it.
4. The opened BlueJ window will look like this:
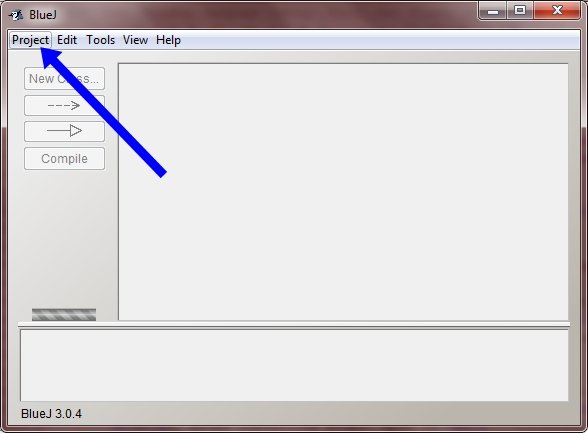
5. Now click on the Project menu, then New Project, which is present at the left top of the BlueJ window as shown in the following figure:
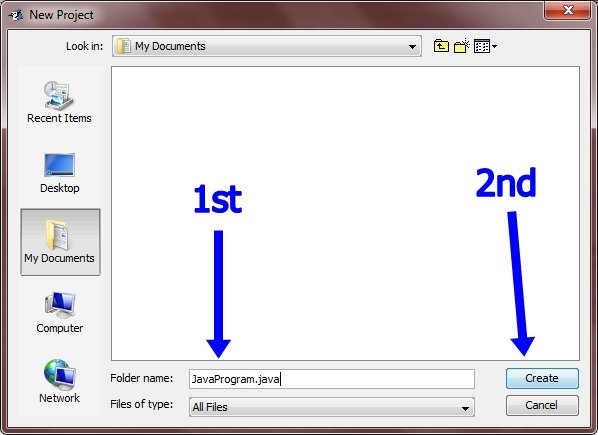
6. Now type a project name like JavaProgram.java and click "create," or simply press enter as shown in the following figure:
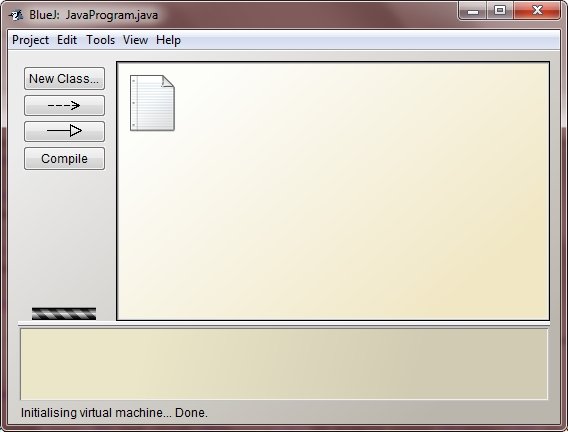
7. After performing this action, you will watch some changes in the BlueJ window as shown in the following figure:
8. Now click on the New Class menu and type a class name like "JavaProgram," then click the OK button as shown in the following figure:

9. After performing this action, you will again see some changes in the BlueJ window as shown in the following figure:
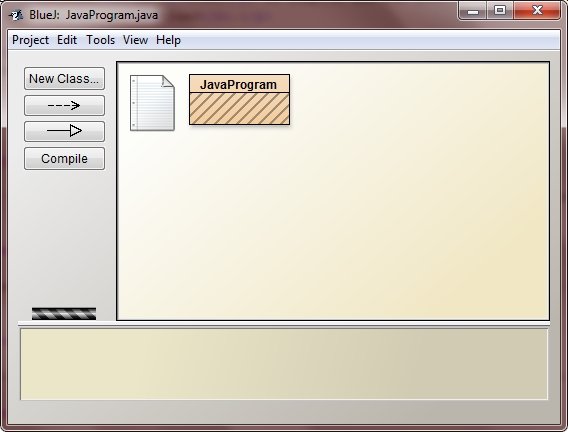
10. Now press double-click on "JavaProgram" or make a right-click on "JavaProgram," and then click on "Open Editor." A new Editor window will come out that will look like this:

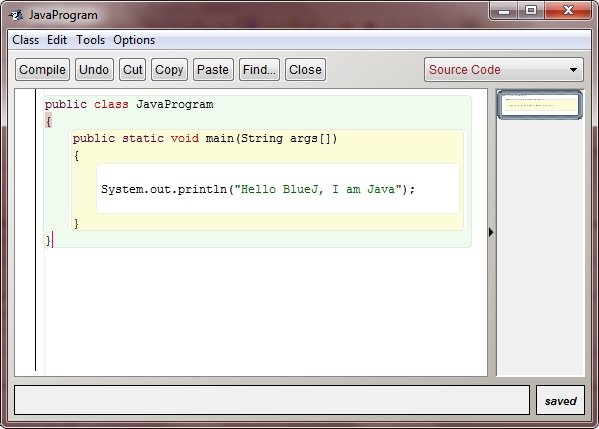
11. Now remove all the codes and texts that are already available in the window and start typing your own Java program, like:
public class JavaProgram
{
 public static void main(String args[])
 {

  System.out.println("Hello BlueJ, I am Java");

 }
}
as shown in the following figure:
12. Now press the "Compile" button. Now you will watch some messages at the bottom of the window, as shown in the following figure:

13. If you will watch and there are no syntax errors, then close the window by pressing the "close" button.
14. Now you will come to the back window; if you want to run and check your Java program's output, then right-click on the class, i.e., "JavaProgram," and then click "void main(String[] args);" now a small window will come out like this:
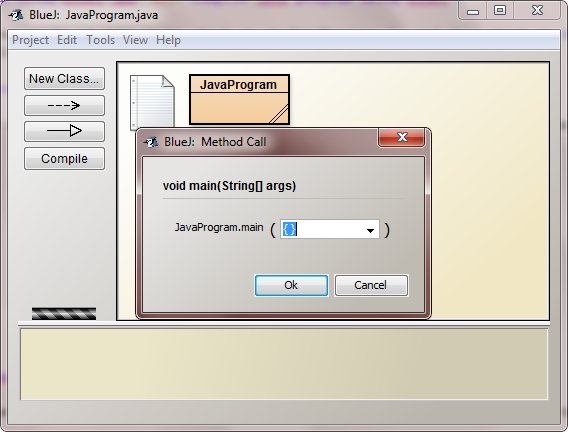
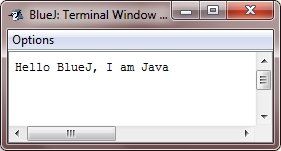
15. Now press the "OK" button to watch the output of your Java program, as shown in the following figure:
Java Environment Setup: NetBean
To compile and run your Java program using NetBean, follow the following steps:
1. Download the Java Development Kit (JDK) from the Internet and install it.
2. Now download NetBean from the Internet and install it.
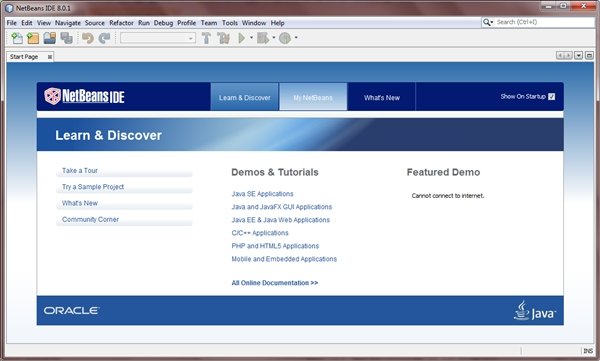
3. After installing NetBean, open it.
4. The opened NetBean window will look like this:
5. Now click on the "File" menu, then "New Project," which is present at the top left of the window. A new window will come out, as shown in the following figure:

6. Now click on the "Next" button, and a new window will come out as shown in the following figure:
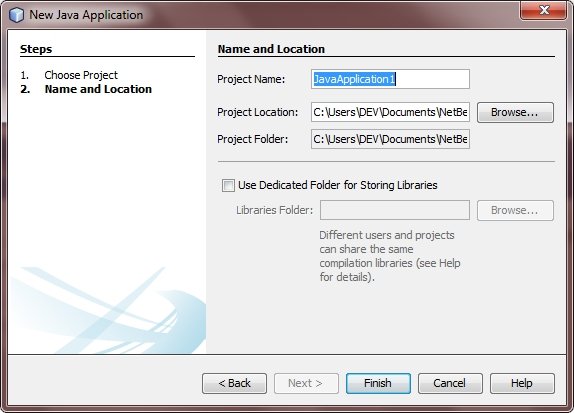
7. Now, you can type your project name or simply leave it with its default name, like JavaApplication1, and press the "Finish" button. After pressing the "Finish" button, your project is created, and a new window (i.e., the editor window) will come out, as shown in the following figure:

8. Now you can type your Java programming code after the main() function, i.e. below the // TODO code application logic here. You can also delete all the pre-written codes and texts and write fresh code after removing unusable texts, as shown in the following figure:
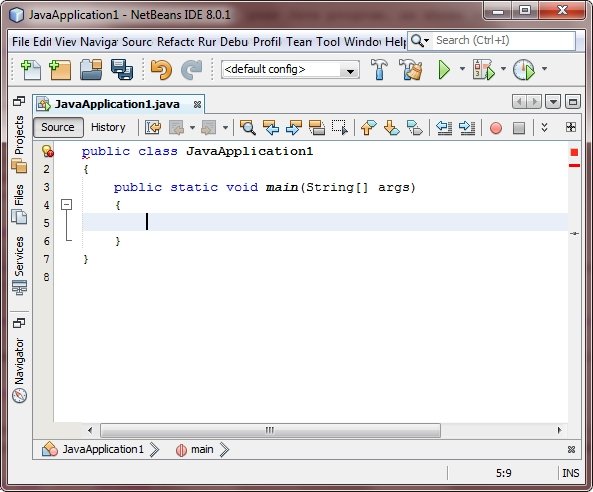
9. Now type your Java program like this:
public class JavaApplication1
{
 public static void main(String[] args)
 {

  System.out.println("Hello Netbean!, I am Java");

 }
}
as shown in the following figure:

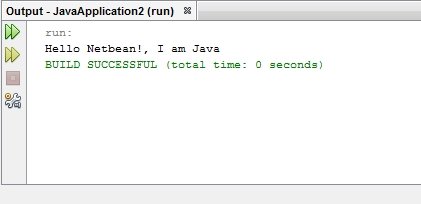
10. After typing your Java program, you can compile it by pressing the "F9" button and run it by pressing the "F6" button, or you can compile it by clicking on the "run" menu present at the top of the Netbean window. After compiling and running the above Java programming code, you will see the output as shown in the following figure:
Java Environment Setup: Command Prompt
Compile and Run the Hello World Java Program using Command Prompt
public class JavaProgram
{
 public static void main(String args[])
 {

   System.out.println("Hello World");

 }
}
Let's see how to compile and run the above Java program using the command prompt. Let's explain how to save the file, compile, and then run the program using the text editor (Notepad):
- Copy and paste the above code in Notepad (the Windows text editor).
- Save the file with the name JavaProgram.java.
- Now open the command prompt window (for Windows users) just by pressing the Windows key, then type cmd and press the ENTER button, and go to the directory where you saved the class. Now let's assume it is in the "C:\" directory.
- Type "javac JavaProgram.java" and press the ENTER button to compile your code. If there are no errors in your code, then the command prompt will take you to the next line (assuming that the path variable is already set).
- Type "java JavaProgram" to run your Java program.
- After performing this, it will print "Hello World" on the window.
Here is the output produced by the above Java program after typing the first two lines:
C : > javac JavaProgram.java
C : > java JavaProgram
Hello World
« Previous Tutorial Next Tutorial »