- HTML Course
- HTML Tutorial
- HTML Document Structure
- HTML Root Tags
- HTML Flow Tags
- HTML Interactive Tags
- HTML Basic Tags
- HTML Paragraph
- HTML Line Break
- HTML Horizontal Line
- HTML Images
- HTML Data Types
- HTML Attributes
- HTML Character Entities
- HTML Styles
- HTML Formatting Text
- HTML Logical Style Text
- HTML Organizing Text
- HTML List
- HTML Tables
- HTML Forms
- HTML action Attribute
- HTML Multimedia
HTML IMG Tag | Insert an image into HTML
In this article, you will learn about the IMG tag, an HTML tag, which is used when we need to insert an image into a web page. So without any further delay, let's start.
HTML allows you to insert an image into a web page with the help of the IMG tag. This tag uses several attributes, such as src, id, lang, dir, and alt. Out of all the attributes of the IMG tag, only the src attribute is necessary.
Please note: Attributes are used to change the behavior of an HTML element.
Following is a syntax to use when we need to insert an image into HTML.
<IMG src="image_url" alt="alternate_text">
In place of "image_url," provide the image file name if the image and HTML file are both in the same directory, or the full or relative path to the image file if the image and HTML file are not in the same directory. If the image fails to load, the "alternate_text" is displayed.
Attributes of the IMG tag
The following table describes the attributes of the IMG tag:
| Attribute | Description |
|---|---|
| id | assigns a unique identifier to a tag. This identifier must be used only once in a document. |
| class | assigns a single name or a set of class names to a tag. However, one or more tags can be assigned with the same class name. |
| lang | specifies the base language used for the IMG tag. |
| dir | assigns a direction to the entire or a section of an HTML file. |
| title | describes the purpose of using the IMG tag. |
| style | applies inline CSS style to individual tags in an HTML file. |
| src | specifies the URL or the location of the image. |
| alt | specifies the alternate text to be used if the web browser cannot render the image. |
| height | specifies the height of the image. |
| width | specifies the width of the image. |
| ismap | indicates that the image is used as an image map. |
| usemap | associating a tag with an image map. |
Only one of the IMG tag's above-mentioned attributes, "src," is required. That is, with the exception of the "src" attribute, all of the attributes are optional. However, I recommend that you make the "src" and "alt" attributes mandatory.
HTML alt Attribute
As already stated, the "alt" attribute of the "img" tag is used to display the alternative text if the image load fails. For example:
<!DOCTYPE html>
<html>
<body>

   <img src="none.jpg" alt="top 5 programming languages">

</body>
</html>
Since the file "none.jpg" is not available, the text "Top 5 programming languages" will be displayed. Here is its sample output for your understanding:

There is an icon (as indicated in the above figure by the red arrow) that will be displayed by the web browser before the "alt" text to inform the user that this is not the normal text but rather the alternative text of an image file.
Set the width and height of the image in HTML
We have two options to set the size of the image: one using directly the "width" and "height" attributes, and the other using the "style" attribute. Let me first create an example that uses the "width" and "height" attributes to set the size of the image.
<!DOCTYPE html>
<html>
<body>

   <img src="https://codescracker.com/html/images/html5.jpg" height="120" width="60" alt="html5">

</body>
</html>

In the above example, in place of "https://codescracker.com/html/images/html5.jpg," I can also use "/html/images/html5.jpg." The first one is the complete path of the image file, whereas the second one is the relative path of the image file.
Please keep in mind that the values you enter for the "width" and "height" attributes are in pixels (px).
And the following example used the "style" attribute to do the same job as the previous example:
<!DOCTYPE html>
<html>
<body>

   <img src="/html/images/html5.jpg" style="height: 120px; width: 60px;" alt="html5">

</body>
</html>
You will get the same output as the previous example's output.
Image alignment in HTML
You can use the "style" attribute to align the image to the left, right, center, top, or bottom of the web page. For example:
<!DOCTYPE html>
<html>
<body>

   <img src="/html/images/html5.jpg" style="display: block; width: 120px; margin: 40px auto;" alt="html5">

</body>
</html>
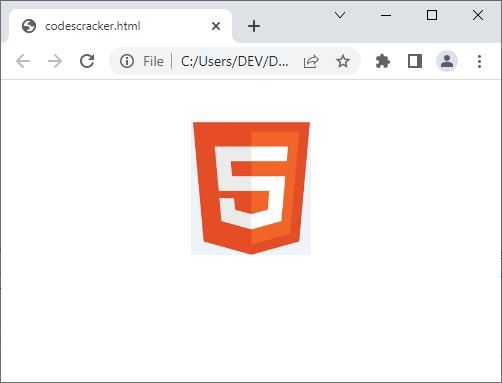
The output produced by the above example of centering the image on the web is shown in the snapshot given below:

The "display: block" creates a block-level container. It makes the element behave like the P element. A block-level element starts with a new line and acquires the whole width of that line. To learn in detail, refer to the separate tutorial on the topic "CSS display."
The "margin: 40px auto" property is used to add a 40px top and bottom margin, as well as an equal left and right margin. Essentially, I used this code to center the image horizontally, with 40px margins on the top and bottom.
« Previous Tutorial Next Tutorial »